OSINT - 0DAY
by
1️⃣ Session 1: Introduction to Open-Source Intelligence
- Date & Time: Saturday, October 4, 2025 · 3:00 PM – 6:00 PM (MYT)
- Event: OSINT by 0day
- Speaker: Nazrul Affiq
- Format: Live Virtual (Zoom)
🔍 Topics Covered
- Intelligence fundamentals and the OSINT process
- OSINT source taxonomy and the OSINT Stack
- Mastering advanced searches (Google dorking, search operators)
- Individual digital footprint & CTF hands-on
🎯 My Experience

This was my first official OSINT session under 0day, and it was both exciting and challenging. The session introduced the fundamentals of intelligence, then moved into practical OSINT workflows using tools and techniques that investigators rely on.
The highlight was the CTF hands-on, where we put our learning into practice by solving real-world style challenges. Out of 7 challenges, I successfully solved all the given challenges 🎉 — covering areas like digital footprint tracing, public records lookups, and open-source investigation platforms.
✅ Challenges (brief) — What they asked & How I solved them
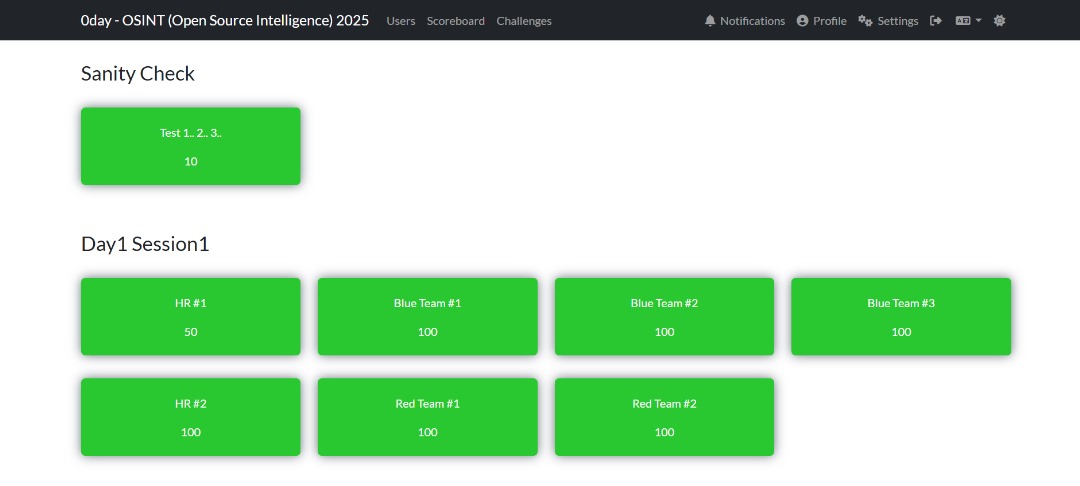
Below are condensed challenge descriptions and the approach I used (no flags included):
-
Corruption records lookup: Task: Verify if a candidate had corruption convictions. Approach: Start with authoritative sources — government portals and court databases; corroborate with mainstream news archives.
-
Legal classification lookup: Task: Find statutory classification of a convicted individual. Approach: Locate the offender entry on the official corruption registry and extract the exact offence wording and statutory section.
-
Website reconnaissance (IP & hosting): Task: Resolve a company domain to IP and identify hosting. Approach: nslookup / dig → capture A records → whois on IP to determine ASN/registrant (confirmed GitHub Pages / Fastly CDN).
-
CDN identification: Task: Identify CDN used to serve the site. Approach: Follow CNAME chains and check response headers; corroborate with IP ranges / whois to map to CDN provider / I found it in Shodan using the IP Address found in
nslookup185.199.111.153. -
Malware/sample tracing (hash → report): Task: Given a SHA256 and filename, find the public analysis/report. Approach: Search sandboxes and threat intel platforms (VirusTotal, Hybrid Analysis, Triage, FileScan), pivot on “Relations” and sandbox comments, and use exact-hash Google dorks and inurl:/report filters to find printable report endpoints.
2️⃣ Session 2: Uncover Individual’s Digital Trails
- Date & Time: Saturday, October 4, 2025 · 9:00 PM – 12:00 AM (MYT)
- Event: OSINT by 0day
- Speaker: Nazrul Affiq
- Format: Live Virtual (Zoom)
🔍 Topics Covered
- Social Media Intelligence (SOCMINT)
- Leveraging Data Breaches for OSINT investigation
- Profiling Individuals to Hunt Cyber Criminals
- Practical Individual’s OSINT (CTF Hands-on)
🎯 My Experience
 Session 2 focused on SOCMINT (Social Media Intelligence) and practical techniques for uncovering individual digital trails. The session demonstrated advanced search techniques on X (formerly Twitter), how to triage suspicious URLs, and how to pivot from social chatter to technical artefacts (URL scans, sandbox reports, and analyst write-ups).
Mr.Nazrul also briefly showed few of the tools from the list below.
💻 Tools & Quick Uses (Session Highlights)
-
VirusTotal — centralized aggregation of antivirus detections, URLs, relationships, and external sandbox links. Tip: Paste a hash/URL and check Relations for sandbox reports.
-
Tria.ge (Hatching Triage) — automated dynamic analysis sandbox with public task pages. Tip: Useful for quick behavioral snapshots and downloadable PCAPs/screenshots.
-
Any.run — interactive malware sandbox (replayable runs, screenshots, network traces). Tip: Great when you need to step through execution manually and capture UX screens.
-
Polyswarm — crowd-sourced malware detection marketplace and sandbox results. Tip: Use for alternate vendor verdicts when VT or Hybrid disagree.
-
Zulu / Zscaler — enterprise web filtering / security telemetry — useful for context on blocked/malicious domains. Tip: Check if a domain is known-malicious in enterprise filters.
-
ViewDNS — multi-purpose DNS & historic DNS lookup tools (reverse whois, reverse IP). Tip: Use reverse IP to find other domains hosted on same IP.
-
Sucuri Site Check — website scanner for malcode, blacklist status, and basic security headers. Tip: Quick way to see if a site is flagged by common blacklists.
-
AlienVault OTX — community-driven IOC sharing (pulses) and enrichment. Tip: Search pulses for domain/hash to find campaign context and related IOCs.
-
URLscan.io — live URL triage: screenshots, redirect chains, loaded resources, and hosting info. Tip: Submit suspicious links and use the screenshot+resources for evidence and pivoting.
-
Lookyloo — web page archival and resource-graphing; good for visualizing site structure and scripts. Tip: Use it to see how resources are connected and spot suspicious third-party scripts.
-
Vulnerability Lookup — (enum tooling) check CVEs or known vulnerabilities associated with services. Tip: Map exposed services to CVEs for attack surface assessment.
-
Certificate Search — find TLS certificates, associated domains, and issuance history (eg. crt.sh). Tip: Use certificate common names / SANs to pivot between related domains.
-
AbuseIPDB — community-reported malicious IPs and abuse scoring. Tip: Quickly validate if an IP has prior abuse reports before blocking or investigating.
-
ThreatFox — Malware & IoC sharing (abuse.ch project family) — quick lookups for malicious domains and URLs. Tip: Great for finding active malware campaigns and downloadable samples.
-
Malware Bazaar — repository of malware samples (abuse.ch). Tip: Search by hash to find sample metadata, tags, and download links; often links to sandbox runs.
🕵🏽♂️ X’s Advance Search (Live Activity)
I used X’s advanced search to hunt for scam/phishing related posts mentioning major Malaysian organisations — the exact query I used:
(scam OR spam OR phish OR phishing OR legit OR link OR url OR hack OR sms)
(@MCMC_RASMI OR @Petronas OR @ShopeeMY OR @LazadaMY OR @GrabMY OR @MaxisListens
OR @Maxis OR @CelcomDigi OR @CIMBMalaysia OR @posmalaysia OR @umobile OR @MyMaybank
OR @Tenaga_Nasional OR @mytouchngo OR @jntexpressmy) until:2024-12-31 since:2024-01-01
This returned public posts that mentioned potential phishing/scam activity targeting customers of those brands within 2024.
✅ Challenges (Individual Footprinting)
For the final challenges in Session 2, I applied a combination of open-source intelligence techniques:
- Identity Verification: Found the victim’s IC through Google search and Google Images.
- Voter Information: Checked the registered voting area using the MySPR Semak portal.
These steps allowed me to accurately map the target’s public information and complete the challenge.

3️⃣ Session 3: Exposing Organization’s Digital Footprint
- Date & Time: Saturday, October 5, 2025 · 3:30 PM – 6:30 PM (MYT)
- Event: OSINT by 0day
- Speaker: Nazrul Affiq
- Format: Live Virtual (Zoom)
🔍 Topics Covered
- Information Attack Space / Attack Surface Monitoring
- Intelligence-Driven Defense
- Deep & Dark Web / Leak Forums Investigations
- Practical Organization’s OSINT (CTF Hands-on)
🎯 My Experience
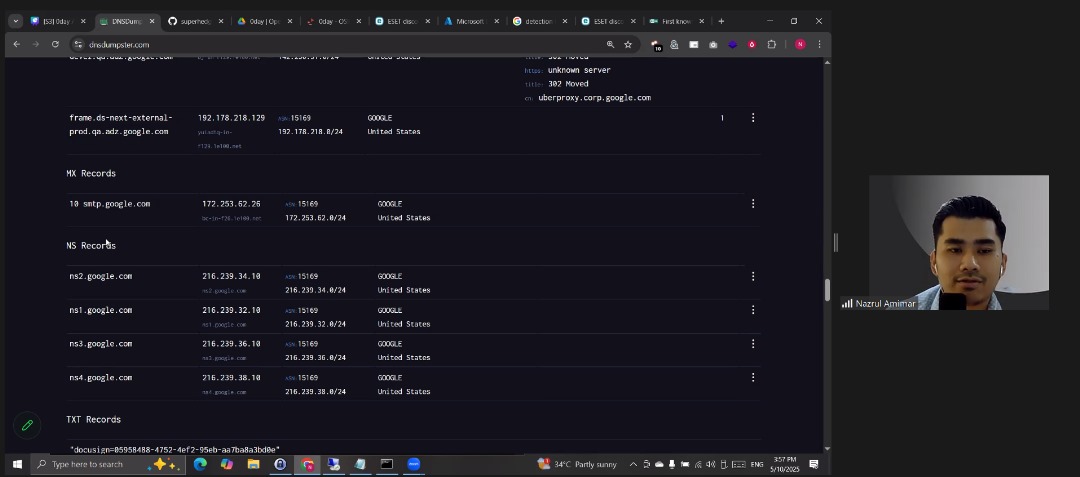 During Session 3, Mr.Nazrul began by revisiting the challenge from Session 1, demonstrating how to solve it using DNSDumpster. Through this, we learned how an organization’s IP addresses, CDN information, and related DNS records can be discovered as part of its exposed digital footprint. The session then moved into the concept of an Information Attack Space, where various tools used for reconnaissance, scanning, and monitoring were introduced. Tools like Nmap were explained for active scanning and service discovery, while Microsoft Defender was mentioned as an example of a commercial endpoint detection solution. The instructor emphasized the importance of combining open-source and commercial tools depending on an organization’s size and security needs.
We were also introduced to Feedly, a platform that helps cybersecurity professionals stay updated with the latest security news, threat intelligence feeds, and blog posts in one place. Similarly, Cybersecurity Explorer by Henry Adrian was highlighted as a useful resource for exploring cybersecurity domains, tools, and research content. Next, we learned about the MITRE ATT&CK Framework, which provides a globally recognized structure for understanding attacker behavior through tactics and techniques, helping organizations build intelligence-driven defenses.
The instructor then demonstrated how to use Google Alerts to create automated keyword-based notifications for monitoring specific terms like company names or data leaks — a simple yet powerful method for brand and threat monitoring. The discussion continued with an overview of the Deep Web, Dark Web, and Tor, explaining how the deep web contains unindexed content, while the dark web is intentionally hidden and accessible via the Tor network for anonymity. Finally, we explored Archive.ph, a website used to take and preserve snapshots of web pages, which is extremely useful for OSINT investigations when content gets deleted or taken down.
Overall, this session provided a deeper understanding of how organizations can be mapped, monitored, and protected through OSINT techniques, digital footprint awareness, and intelligence-driven defense practices.
🕵️♂️ Challenge Explanation: Tracing the Web Defacement (Session 3)
Background: A day after the strange text appeared on the company’s website, the CSIRT (Cyber Security Incident Response Team) received reports that the official website, dayaterasdinamik.my, had shown unusual content. By the time the team began investigating, the site had already returned to normal. Fortunately, the MSSP (Managed Security Service Provider) — which functions as CSIRT Level 2 — managed to capture a saved snapshot of the defaced page using one of their digital footprint monitoring tools (as mentioned in the “Exposing Organization’s Digital Footprint” slide).
My task was to identify where the company’s website was hosted and who was responsible for uploading the altered content.
🔍 Step-by-Step Investigation Process:-
1️⃣ Identifying the Hosting Platform
The first step was to determine where the website was hosted.
I analyzed the A records and WHOIS information of dayaterasdinamik.my.
The DNS results showed IP addresses in the range 185.199.108.0/24, which belongs to ASN 54113 (Fastly, United States) — the same network used by GitHub Pages.
- Commands used:
dig +short dayaterasdinamik.my A
whois 185.199.109.153
curl -I https://dayaterasdinamik.my
The response headers and network traces confirmed that the website used GitHub Pages for hosting, with Fastly as the CDN and Varnish as the caching layer.
2️⃣ Checking Archived Snapshots (Wayback Machine)
Next, I checked if there were any saved versions of the website using Wayback Machine and archive.ph.
The MSSP snapshot revealed the altered page content — and I found a hidden flag within the HTML source:
OSINT{W4yb4ck_iz_4w350M3}
This proved that the attacker’s defacement was preserved in the archived copy, even though the live site was restored.
3️⃣ Finding the GitHub Repository
Since the site was hosted on GitHub Pages, I started searching for related repositories that might contain the website’s source code. Using GitHub search and domain-based hints (dayaterasdinamik.my), I found the public repository linked to the organization.
Once located, I opened the Commits tab to inspect the commit history for any unusual uploads or modifications.
4️⃣ Extracting Commit Metadata
To determine who made the changes, I viewed the commit in raw patch format by appending .patch to the commit URL:
https://github.com/<owner>/<repo>/commit/<sha>.patch
https://api.github.com/users/<GITHUB USERNAME>/events/public - To find emails and username
https://api.github.com/repos/<GITHUB USERNAME>/<GITHUB PAGE> - To find more information
This revealed the Git metadata, including the username and email of the person who made the commit:
"email": "admin@dayaterasdinamik.my",
"name": "dayaterasdinamikadmin"
However, this wasn’t the only commit. After deeper analysis, I discovered that the real admin account involved in altering the website was:
dayaterasdinamikadmin_admin@dayaterasdinamik.my
So, the final flag format was:
OSINT{dayaterasdinamikadmin_admin@dayaterasdinamik.my}

4️⃣ Session 4: Utilizing Maltego for OSINT Research
- Date & Time: Saturday, October 5, 2025 · 9:00 PM – 11:30 PM (MYT)
- Event: OSINT by 0day
- Speaker: Nazrul Affiq
- Format: Live Virtual (Zoom)
🔍 Topics Covered
- Getting started with Maltego Graph
- Maltego Transforms for data enrichment
- Maltego Custom Entities and External Integration
🎯 My Experience
 In this session, I explored one of the most powerful tools for OSINT investigations Maltego. It was a hands-on and highly visual session where I learned how to map digital footprints and uncover hidden connections between people, organizations, domains, and infrastructure.
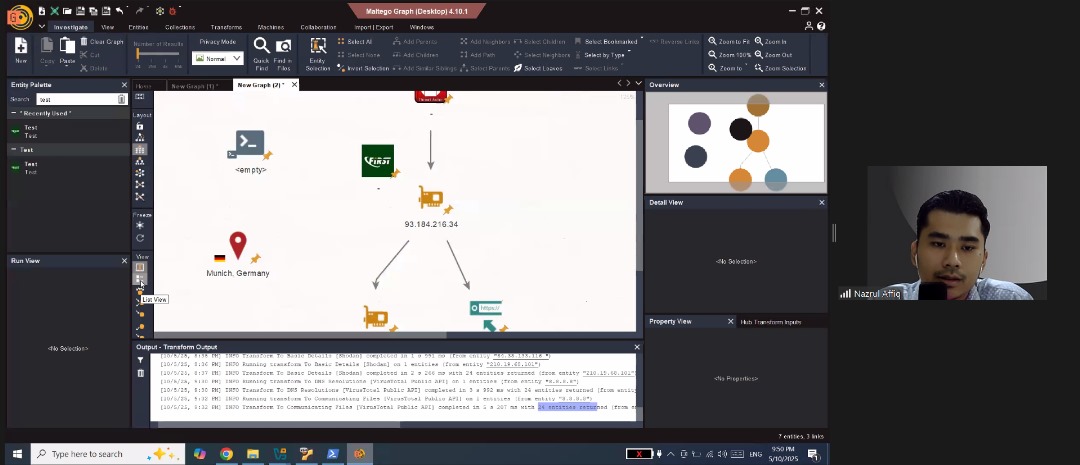
Mr.Nazrul, walked us through the Maltego Graph interface, showing how each node and edge represents a real-world relationship. I especially liked how the platform makes it easy to visualize complex data that would otherwise take hours to piece together manually.
We also learned how to use Maltego Transforms to automatically gather and enrich data from multiple public sources. This part was eye-opening — with just a few clicks, we could pull information like DNS records, email associations, and linked social media profiles.
Towards the end, we explored Custom Entities and External Integrations, which allow analysts to extend Maltego’s capabilities using APIs and third-party data. This gave me a good understanding of how Maltego fits into a broader OSINT workflow and how it can be integrated with other tools or databases for deeper investigations.
Overall, Session 4 helped me understand the true power of visual link analysis in OSINT and how data relationships can reveal patterns that text-based methods might miss. It was a great continuation of the previous sessions — moving from manual searches to automation and visualization.
🧩 Challenge — Maltego OSINT Investigation
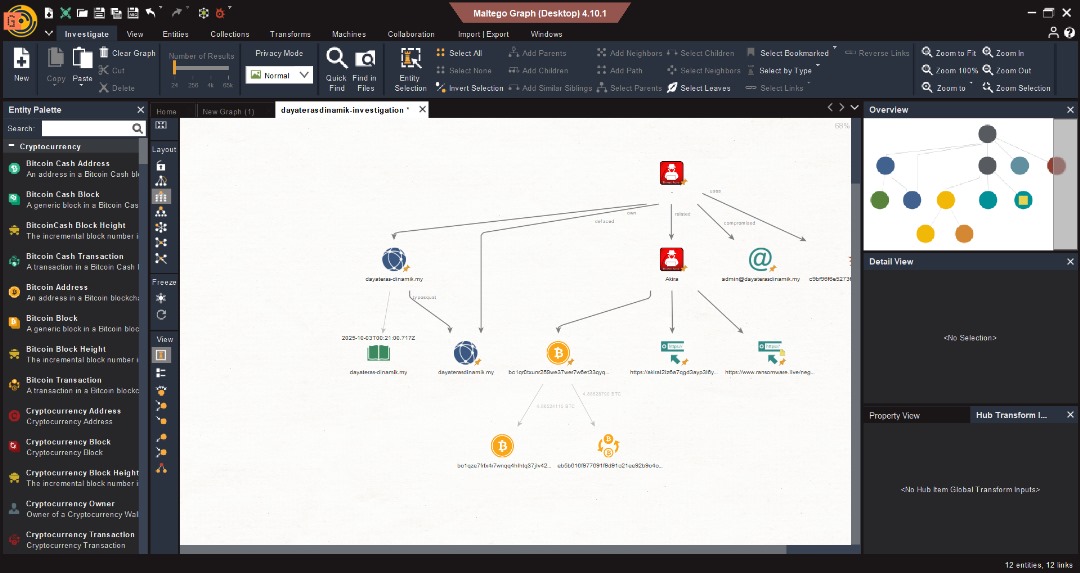
For this session’s challenge, we were given a Maltego graph file to analyze and expand using different transforms. The task was to uncover key pieces of information such as the name server, threat actor name, and malicious file name.
Using Maltego’s transform system, I performed several data enrichment steps. One of the most interesting parts was leveraging Recorded Future’s Triage page to gather deeper threat intelligence — this allowed me to identify indicators related to the threat actor and file behavior patterns.
We also used the Bitcoin transformer, which was a unique experience. It helped trace cryptocurrency transactions and connect wallets that were potentially linked to malicious activity or the identified threat actor.
Through this challenge, I learned how to combine multiple transforms and external intelligence sources to build a clearer, evidence-based OSINT profile. It was a great exercise in critical thinking and demonstrated how Maltego can reveal hidden digital relationships that aren’t visible through normal searches.
🏁 Final Thoughts — OSINT by 0DAY Workshop
Completing all four sessions of the OSINT by 0DAY workshop was an incredibly valuable experience that deepened my understanding of real-world open-source intelligence investigation. Each session built on the previous one — starting from basic search techniques to professional-grade tools and analysis workflows.
Through these sessions, I learned how to think like an investigator, not just a researcher. From uncovering digital traces and verifying information accuracy to mapping connections and identifying threat actors, I gained a full picture of how OSINT operates in cybersecurity, law enforcement, and intelligence fields.
Working with tools like Google Dorks, advanced people search engines, and Maltego gave me a strong foundation in both manual and automated intelligence gathering. The challenges were especially engaging they pushed me to apply what I learned, think creatively, and validate my findings through credible sources.
Overall, this workshop not only improved my technical skills but also reshaped my analytical mindset. I now have a clearer sense of how data, context, and patterns can be used responsibly to uncover truth and enhance digital investigations.
I’m grateful for the guidance from Mr.Nazrul Affiq and the structured learning experience that OSINT by 0DAY provided. This marks the end of the workshop, but definitely not the end of my journey in OSINT.
tags: